I've been having fun sewing in a nice cool air conditioned house. Took the girls to the community pool today for this photo shoot. It was so hot I thought the girls and I would melt. Bathing suits are addicting and I have gone a bit overboard. I am quickly working my way through the 100+ yards of FOE (fold over elastic) and I am getting ready to order more. Whew....who knew. I had always hesitated in working with Lycra/spandex and foe. I just shake my head wondering how I could have waited so long and the lesson learned....don't hesitate, just do it.
Let me just get this out now. I tend to be a perfectionist....no I am a perfectionist! The foe did cause me some issues at first but I developed a few simple tricks that work for me (99.9% of you would not have/want to do this).
1) With a fabric pen: I draw a line along the center fold line of the FOE. When I'm sewing it's hard for these eyes to see the center fold line and the line I draw makes it so easy.
2) I stitch the elastic twice. First time....pinning the fabric to the elastic with the edge of the fabric along my drawn line....then stitch it in place with a "stretch stitch". Then of course I fold the elastic and stitch it in place using a 4.0 zigzag stitch. I know it's a two step process.....but it works for me and a lot better than what I did on my first 1/2 dz. suits......are you ready! I hand basted the elastic on which was very time consuming and then had to remove my basting stitches once the elastic was attached. So..."baby steps" are good. Maybe someday I will be able to do it in one pass.
Blog for me to express my passion for any thing American Girl Doll, sewing and computer crafts.
Wednesday, June 18, 2014
Thursday, June 5, 2014
Bathing Beauties.....
For some reason I am being very productive and making lots of doll clothes. I'm highly motivated because it's that time of year, schools are out for the summer and my Granddaughters will be coming for their annual vacation with Grammy.
These outfits were a bit of a stretch for me as I have never worked with swimsuit stretch fabric and fold over elastic. The bathing suits were made using the "free" swinsuit pattern offered at PixieFaire.
Links:
Swimsuit: http://www.libertyjanepatterns.com/category/all-patterns/free-sample-guidebook
Black sandals: http://www.pixiefaire.com/collections/18-inch-doll-shoe-patterns/products/chic-sandals-18-doll-shoes
Beach bag: A fun find at Build-A-Bear: ww.buildabear.com/shopping/store/Fun-In-The-Sun-Beach-Tote-&-Towel-2-pc./productId=prod11170026
Tuesday, June 3, 2014
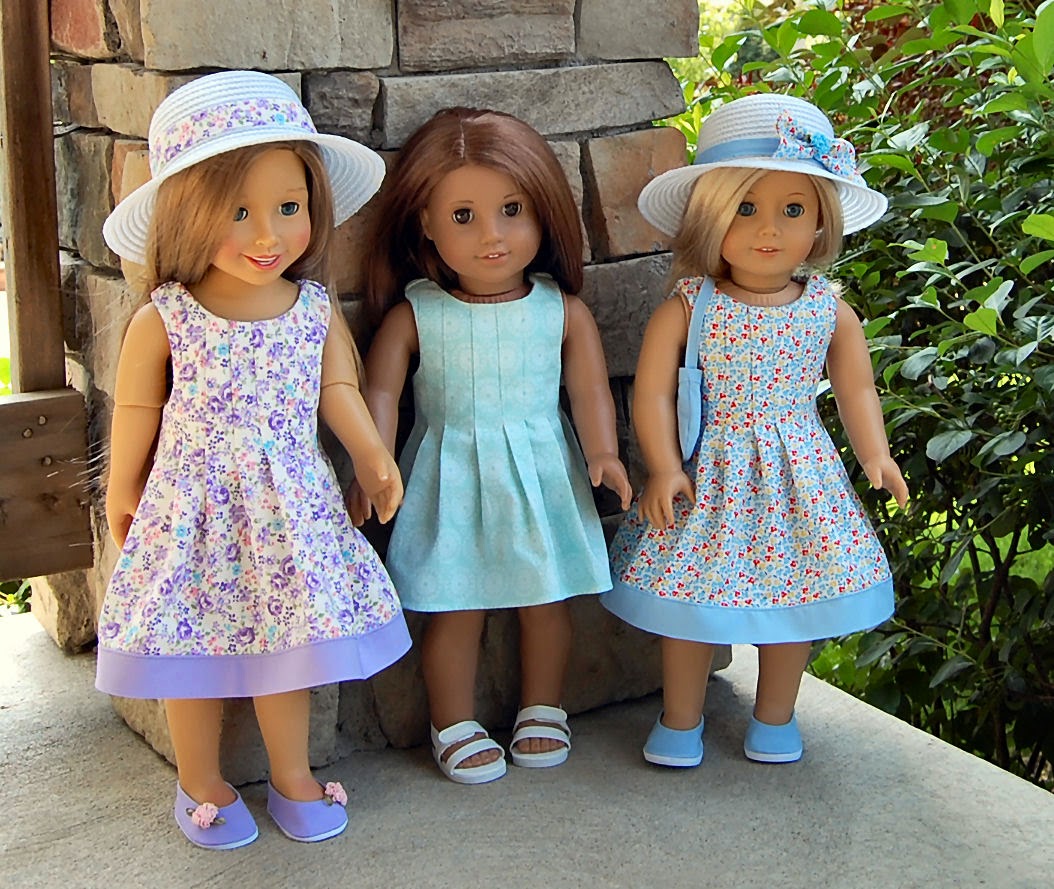
If you like pleats then this Easy Peazy Pleats pattern is for you.
Oh I do have a charmed life. I could sew doll clothes 24 /7. I found this Easy Peazy Pleats pattern by Olive ann designs OAD82. The pattern lives up to it's name. This "pull on pull off" dress was a joy to make.
 | |
| Link to pattern: http://www.oliveanndesigns.com/index2.php#/gallery1/1/ |
Here's a few pictures of my attempts:
Pattern review and tips: I am very pleased with this pattern and the dresses. It is a "pull on, pull off" style.
I made my first dress following the instructions and the dress fit well but I sew doll clothes for several little one's and I felt that the "pull on, pull off" feature would be a challenge for them so I made the next dress with a fully open back seam that closes with Velcro. On my next dress I cut the back along the fold line. Sewed the 2 pieces back together (1/4" seam) but stopped 2 inches from the top. I pressed the entire seam flat then top stitched along the opening. I then used an elastic loop and button to close the 2" opening. I preferred the non-Velcro option.
* Have your iron "hot and ready to go" in order to insure crisp pleats you need to press as you sew.
* Keep your measuring tools and fabric pen close by. Using these tools will help you have perfectly sized
pleats and a dress that fits properly.
* I used a fabric pen to number my pleats in the seam line area at the top of the front and back pieces. I am
old and sometimes get confused so this was helpful for me, but you may not need to do this. After making
3 dresses I figured I would not have to mark so I decided not to. So I ended ripping out several pleats
* If you decide to do the Velcro or 2" opening noted above you may want to place the back pattern piece
1/4" above the fabric fold line making the back piece larger to accommodate a wider fold over area for
Velcro and 2" opening options. Do this for the back facing piece also. Once you cut along the fold line finish the cut edges. .
* For a different look you may consider not adding the bottom band. I would recommend making the
front and back pieces 1 1/2 inch longer for the hem without impacting the length of the dress.
Subscribe to:
Comments (Atom)


