Sunday, November 2, 2014

LEGO Christmas Idea:


05/27/2019

I have updated the info/instructions for the LEGO Candy Dispenser.   The instructions are in a "pictorial format.  


LEGO Candy Dispenser “PDF”

I finally got around to creating a pictorial set of instructions
for the Candy Dispenser.


I created a parts list with Bricklink part numbers.  I listed the basic part number and once entered you will need to select your color choice.  .  If you live near a LEGO store check out their Pick-N-Build wall.  The basic 2x4 bricks are often available in assorted colors.  You will find the other items you need at Bricklink.

Candy Dispenser Pictorial

https://www.dropbox.com/s/wovboo8wim7fost/Untitled%201.pdf?dl=0


I just love Pinterest.    I came across a "pin" featuring a LEGO Candy Dispenser and a pictorial on how to make it.   This is the link to the original post:  http://frugalfun4boys.com/2014/10/20/build-lego-candy-dispenser/ on the Frugal Fun for Boys blog.

I thought it would be fun to give my Grandchildren a kit to make their own candy dispenser for Christmas.   I made one according to the directions and it came out nice and functioned just as a candy dispenser should.

I needed to make about a dozen of them (Grandchildren & friends) so in the interest of minimizing the part count I decided to streamline the build to suit my needs, budget and make changes to enhance it visually.  The larger clear panels was the first change I made.   I also cut down the overall depth of the dispenser giving it a less bulky look while still allowing for an adequate amount of candy. The last change was to give it feet/legs raising it up  making it easier to catch the candy as it's cascading out.  The children will get these "unassembled".   The package (a large PICK-A-Brick cup) will include all the pieces, candy and instructions to build their own candy dispenser.

Here's a picture of the 2 styles I will be making.  


Meet Elizabeth and Katie.  Two delightful young ladies I've gotten to know because of their love for LEGO.   

Elizabeth and Katie


The girls were excited with the surprise LEGO kits I made for them.  Both girls said the pictorial instructions were easy to follow and they had no issues building the Candy dispenser.


 

Wednesday, August 13, 2014

"Pictorial" to make a PVC Chair for your favorite 18" doll


                                    PVC Sling Chair Frame Pictorial
                                 for 18” (AG) Dolls
       by Suzi More  -  http://sosewsuziamericangirldollclothes.blogspot.com/


Materials needed:


½ inch PVC pipe  -   sold in 10 foot length.  You will need about 4 ½ ft for 1 chair.  You can
                                 make 2 chairs or save the extra pipe for another project.


8  -  PVC elbow connectors (90 degree angle)
4  -  3 way connectors


PBC_Chair_Materials_1.jpg


Cut list:   Usings a PVC pipe cutter or some other tool cut the pipe into pieces listed below.


6  -  5 inch pieces
2  -  4 ½ inch pieces
2  -  3 ½ inch pieces
4  -  1 ½ inch pieces


Cuts List.jpg


PVC Prep:


I used the 100% acetone nail polish remover to remove the print and bar codes from the PVC pipe and connectors.


Chair_Pg_1_Prep.jpg


*  I did not use PVC cement to permanently glue the chair together.
The PVC connectors fit snug and the chair was sturdy for a doll.   If you decide to glue the chair pieces together be sure to add the fabric sling prior to doing so or you could design the sling to attach with Velcro.


Steps :             1 & 2

Step 1b.jpg

Step 1a.jpg


Step 3


Step_3 SB.jpg


Step   4


Step_4 SB.jpg


Step  5


Step_5 SB.jpg


Step  6


Step_6 SB.jpg


Step  7


Step_7 SB.jpg


Step  8


Step_8 SB.jpg


Step  9


Step_9  SB.jpg


Step 9 (cont.)


Side_bottom_8.jpg


Step 10


Step_10 final.jpg
Fabric Sling:


Cotton, Twill, home deco fabrics.  I did use duck cloth for one of the chairs and it was too firm for my taste.


Fabric cut size:   6”  X  19 ¼   ”
Finished Sling size:    5”  X  14 ¼ ”


I crafted the finished sling to be 5” wide to cover the joints on the seat and headrest.   I’ve seen the chair covers made narrower to meet at the joint edges and I did not care for that look.


Fold over the two long edges of fabric ¼”,press and fold over again ¼”.  Stitch the folded edges in place with either a straight or zig-zag stitch.


Fold over the two short ends ½” and press.  Fold both short ends again 2 inches.  Stitch along the folded edge to create the casings to run the PVC pipe through.


Since I did not glue the chair frame together I pulled the frame  apart and
installed the sling as shown in the pictures below.   Then snapped the pieces back in place.


Sling_1.jpg
Sling_2.jpg


Sling_3.jpg


Sling_4.jpg


This is my first “pictorial”.  I enjoyed stumbling through  it’s creation.   I hope you find  it
helpful and make lots of chairs for your favorite 18” dolls.   


Suzi More

Monday, August 4, 2014

Lazy Days of Summer


I've had this project on my "to do" list for a long time, I finally decided that I had to get these hammocks made before my Granddaughters arrive next week.   I went to Lowes and with the assistance of a very helpful salesperson I purchased everything I needed to make 2 hammocks. 
 
First things first.  Here is the link to the instructions to make these hammocks.
 
Cost of the materials to build to hammocks
 
PVC, clear cement, assorted screw eyes, wooden dowels = $22.53
Fabric (cotton duck) 1/3 YD per hammock  = $4.76
Total $27.29  = $13.63 per hammock.
 
Hints/tips - Hammock Stand:  The PVC comes with printing all over it even the connectors had printing/ bar codes on them.   After I cut all the pieces to size,  I removed the printing using a rough side of a nail file.  I cleaned/dried all the connectors thoroughly.  Assembly was a snap and only took a few minutes.  I did what I call a dry assembly first to make sure everything fit properly and that the base sat level on my counter top.  I took the stand apart and then glued each segment per the instructions.
 
Hammock:  Wooden dowels and string.   I did this part a bit different from the instructions.  Instead of string I used white  100% polyester cording 3.22mm.  I also changed the way that the cording was to be attached to the dowel.   The instructions suggested cutting a notch in each end of the dowel.   I wanted something sturdier and chose to screw a metal eye into the dowel ends.   The instructions called for 5/16 wooden dowel, I opted for 3/8 inch dowel. 
 
Side note:   This is a hammock and by nature hammocks generally require a little bit of balance on the part of a human and or doll when you use it.   So when placing your doll into it you will have to do some adjustments to have your doll balanced properly.   I have fabric cut and sewn for 4 more hammocks and will be making a trip to Lowes for more PVC.   These were fun and easy to make and I would definitely encourage you to make them.   I don't have a workshop and own very few tools, since I planned on making more of these as well as other PVC doll furniture items I purchased a PVC pipe cutter and easily cuts 1 - 1/4 PVC. 


Wednesday, June 18, 2014

Bathing Beauties (part 2)

I've been having fun sewing in a nice cool air conditioned house.   Took the girls to the community pool today for this photo shoot.   It was so hot I thought the girls and I would melt.   Bathing suits are addicting and I have gone a bit overboard.   I am quickly working my way through the 100+ yards of FOE (fold over elastic) and I am getting ready to order more.   Whew....who knew.   I had always hesitated in working with Lycra/spandex and foe.   I just shake my head wondering how I could have waited so long and the lesson learned....don't hesitate, just do it. 

Let me just get this out now.   I tend to be a perfectionist....no I am a perfectionist!  The foe did cause me some issues at first but I developed a few simple tricks that work for me (99.9% of you would not have/want to do this).

1)  With a fabric pen:   I draw a line along the center fold line of the FOE.   When I'm sewing it's hard for these eyes to see the center fold line and the line I draw makes it so easy.

2)  I stitch the elastic twice.   First time....pinning the fabric to the elastic with the edge of the fabric along my drawn line....then stitch it in place with a "stretch stitch".    Then of course I fold the elastic and stitch it in place using a 4.0 zigzag stitch.         I know it's a two step process.....but it works for me and a lot better than what I did on my first 1/2 dz.  suits......are you ready!   I hand basted the elastic on which was very time consuming and then had to remove my basting stitches once the elastic was attached.    So..."baby steps" are good.   Maybe someday I will be able to do it in one pass.


Thursday, June 5, 2014

Bathing Beauties.....

For some reason I am being very productive and making lots of doll clothes.    I'm highly motivated because it's that time of year,  schools are out for the summer and my Granddaughters will be coming for their annual vacation with Grammy.  

These outfits were a bit of a stretch for me as I have never worked with swimsuit stretch fabric and fold over elastic.     The bathing suits were made using the "free" swinsuit pattern offered at PixieFaire.
Links:

Swimsuit:   http://www.libertyjanepatterns.com/category/all-patterns/free-sample-guidebook

Black sandals:  http://www.pixiefaire.com/collections/18-inch-doll-shoe-patterns/products/chic-sandals-18-doll-shoes

Beach bag:   A fun find at Build-A-Bear:  ww.buildabear.com/shopping/store/Fun-In-The-Sun-Beach-Tote-&-Towel-2-pc./productId=prod11170026

Tuesday, June 3, 2014

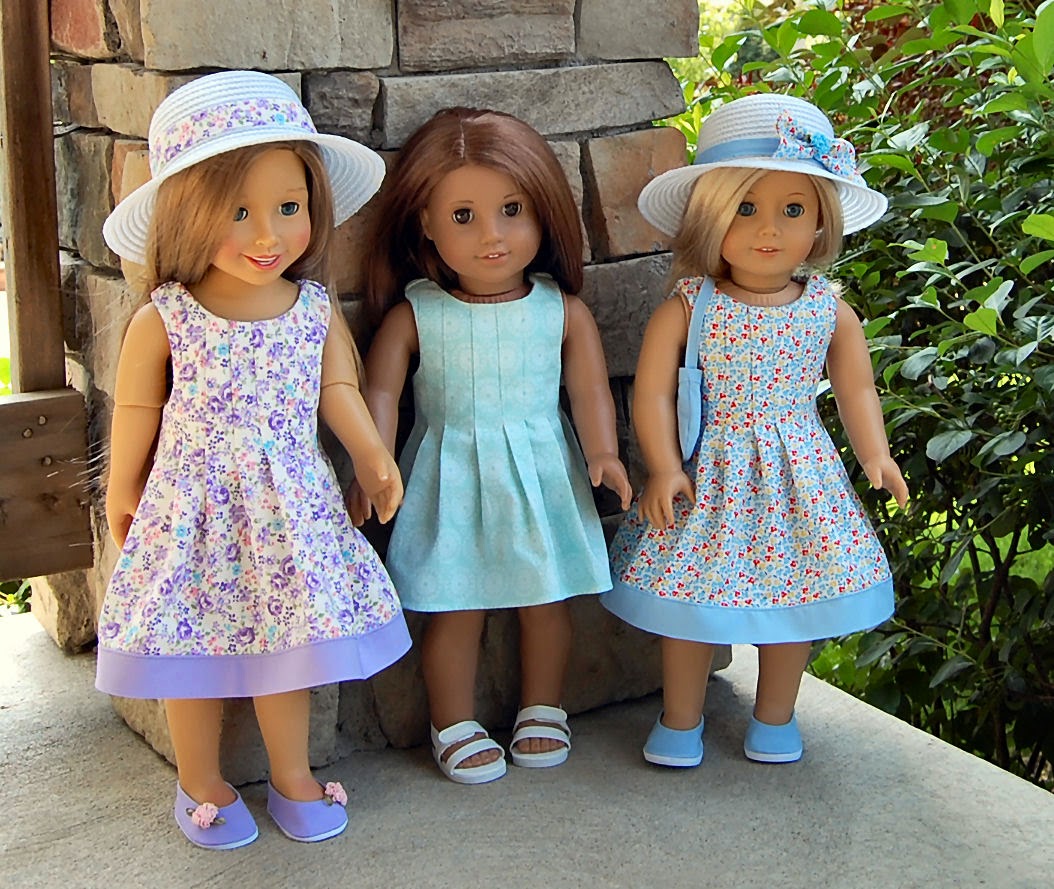
If you like pleats then this Easy Peazy Pleats pattern is for you.


Oh I do have a charmed life.   I could sew doll clothes 24 /7.   I found this Easy Peazy Pleats pattern by Olive ann designs OAD82.   The pattern lives up to it's name.   This "pull on pull off" dress was a joy to make.


Link to pattern:
http://www.oliveanndesigns.com/index2.php#/gallery1/1/ 

  Here's a few pictures of my attempts:


Pattern review and tips:   I am very pleased with this pattern and the dresses.  It is a "pull on, pull off" style.
I made my first dress following the instructions and the dress fit well but I sew doll clothes for several little one's and I felt that the "pull on, pull off" feature would be a challenge for them so I made the next dress with a fully open back seam that closes with Velcro.   On my next dress I cut the back along the fold line.   Sewed the 2 pieces back together (1/4" seam) but stopped 2 inches from the top.   I pressed the entire seam flat then top stitched along the opening.   I then used an elastic loop and button to close the 2" opening.   I preferred the non-Velcro option. 

*  Have your iron "hot and ready to go"  in order to insure crisp pleats you need to press as you sew.

*  Keep your measuring tools and fabric pen close by.   Using these tools will help you have perfectly sized
    pleats and a dress that fits properly.

*  I used a fabric pen to number my pleats in the seam line area at the top of the front and back pieces.  I am
    old and sometimes get confused so this was helpful for me, but you may not need to do this.  After making
    3 dresses I figured I would not have to mark so I decided not to.   So I ended ripping out several pleats

*  If you decide to do the Velcro or 2" opening noted above you may want to place the back pattern piece
   1/4" above the fabric fold line making the back piece larger to accommodate a wider fold over area for 
   Velcro and 2" opening options.    Do this for the back facing piece also.  Once you cut along the fold line        finish the cut edges.      . 

*  For a different look you may consider not adding the bottom band.   I would recommend making the 
    front and back pieces 1 1/2 inch longer for the hem without impacting the length of the dress.
    

Sunday, May 4, 2014

OMG!!!!  I made a pair of shoes.

I'm so excited I am going straight to the picture.


Now for the details:   The only thing I did not make was the HAT it was purchased from Build-A-Bear, one of my favorite places to pick up cute accessories at affordable prices.  The hat has pink trim with a bow on the side.  Retails for $6.00.

I made the BAG using a pattern for a "people size" bag pattern that was a free download from Made by Rae it's called the Buttercup bag.  So cute.   See the close up picture below.

Oh and my first attempt at SHOES!   Using the "Plain Jane Shoes" pattern by  
Love U Bunches which can be purchased at:  http://www.pixiefaire.com/collections/18-inch-doll-clothes-patterns  Retails for only $3.99.  If you have ever thought about making shoes.....this is a great pattern to help you get started.


Skirt & Shirt  were made using the Savannah Skirt pattern made by SEW Urban which can also be found at Pixie Faire.  Retails for $3.99.   I used  the Bella pattern from http://www.bunnybear.com/2010s/bella-twilight-pattern  Retails for $8.95.